Tracking Link Clicks with Tag Manager Part I: The Basics
Posted in Search & Social
Note: This post covers the underlying basics of link click tag setup. For specific examples about email, PDF, social media links, and more see Part II.
In the olden days, if you wanted Google Analytics to track a specific click on a link, you used to have to ask a web developer to fix this up for you. This code looked something like the mumbo jumbo in the bolded text below (something about recording the outbound link, yada yada):
<a class="fb" href="http://www.facebook.com/mypage" target="_new" onclick="recordOutboundLink(this, 'Outbound Links', 'Facebook', 'Global Nav');return false;">facebook</a>
Of course, that was a huge pain for web developers everywhere, so Google created Google Tag Manager.
Now, it's easy to set up tracking for almost any type of link click, without a dev needing to add custom code. (Caveat: in certain cases, you may need some additional dev help, but this post focuses on the simplest types of implementations.)
STEP 0: Make Sure You're Using GTM :)
First, ensure you've got Google Tag Manager configured and working on your website. Yes, this is a "no duh" step.
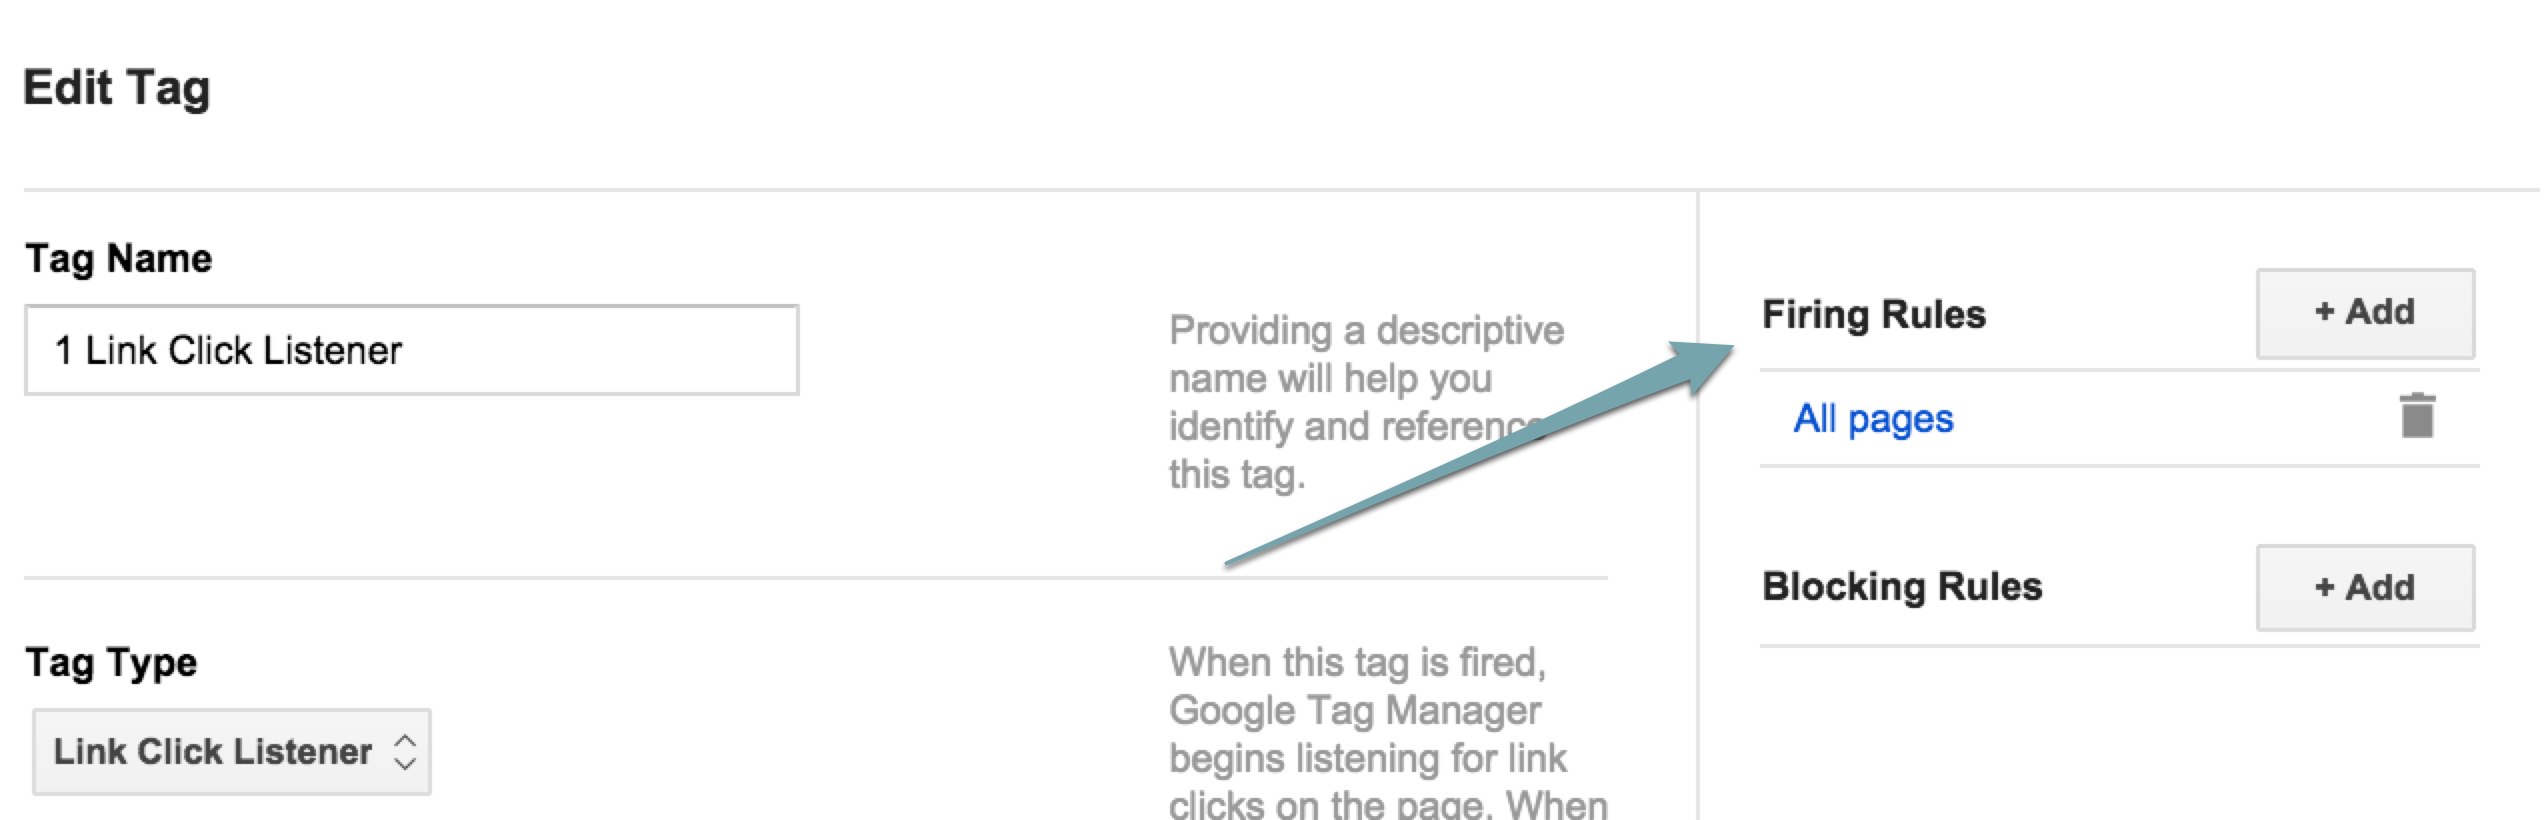
STEP 1: Create a Link Click Listener Tag
Note: This step is not required any more with newer versions of Tag Manager.
Tag Manager uses several different types of event listener tags. Google Analytics doesn't "listen" for link click events by default, so that's why we have to go the extra work of creating a link click listener tag.
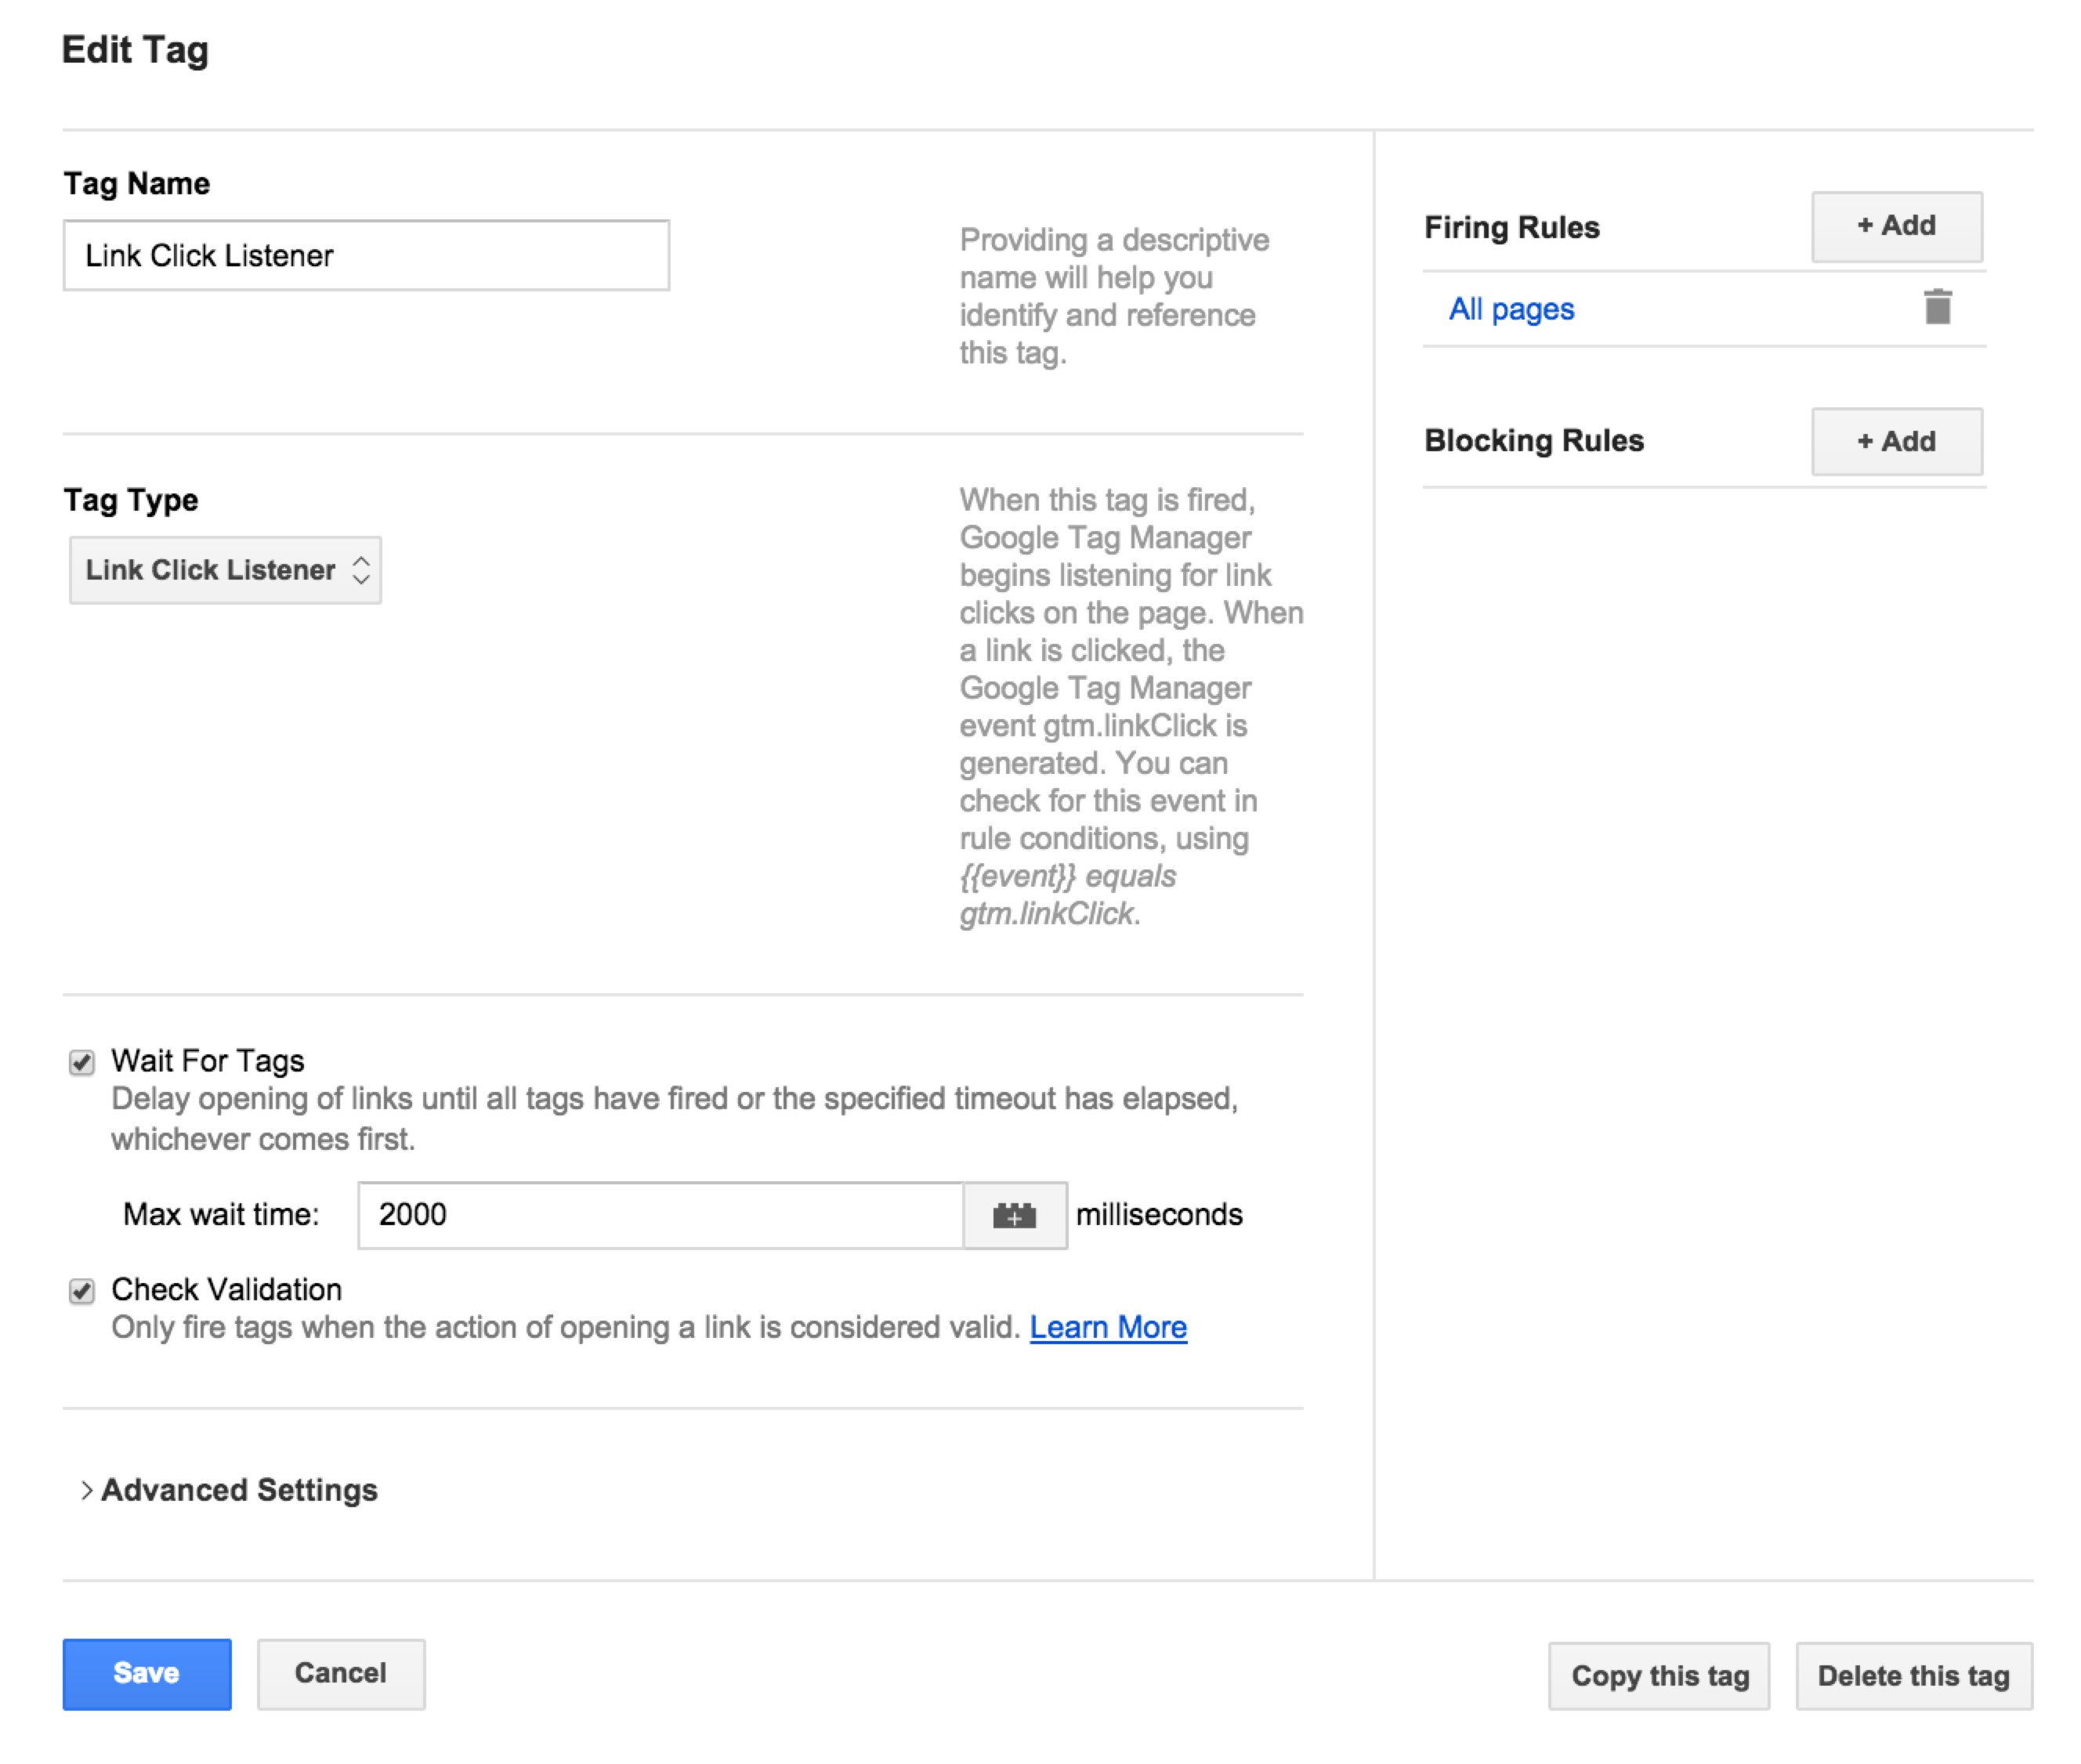
- Tag Name: You can name a tag anything you like: "Link Click Listener" seems like a pretty obvious place to start.
- *Tag Type: * Select "Link Click Listener" as the tag type. Obviously.
- Wait for Tags: If you want, you can delay the opening of a link until the tag has fired. This ensures there's enough time to track the click.
- Check Validation: Also optional, but this just makes sure the user "really" clicked on the link.
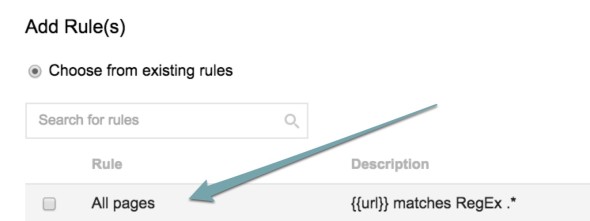
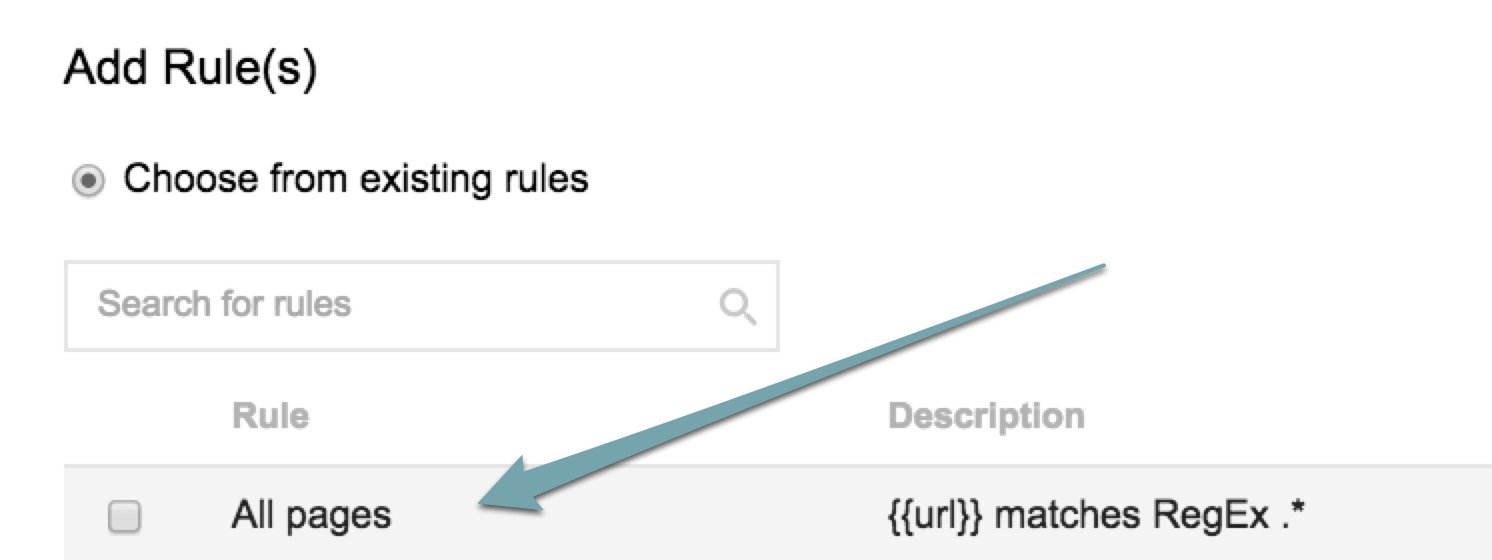
- Firing Rules: Set to All Pages
You want Tag Manager to listen for all link clicks on all pages - so just check the preconfigured firing rule for "All pages".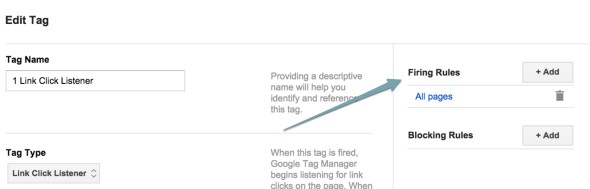
STEP 2: Create Tags for Tracking Individual Links
You can create tags to track lots of different link clicks:
- Email addresses
- PDF and file downloads
- Social media profiles
- All external links, or
- Just the most important external links
- Important calls to action (ex: "Register Now")
- Etc., etc....
*Before you get started, be sure to plan out your events first. See the addendum below for details. *
Once you've mapped out your plan, then you can start creating tags. Please refer to Part II of this post for specific cases of tags you can create.
In the meantime, here's the basic breakdown of how a link click event tag works:
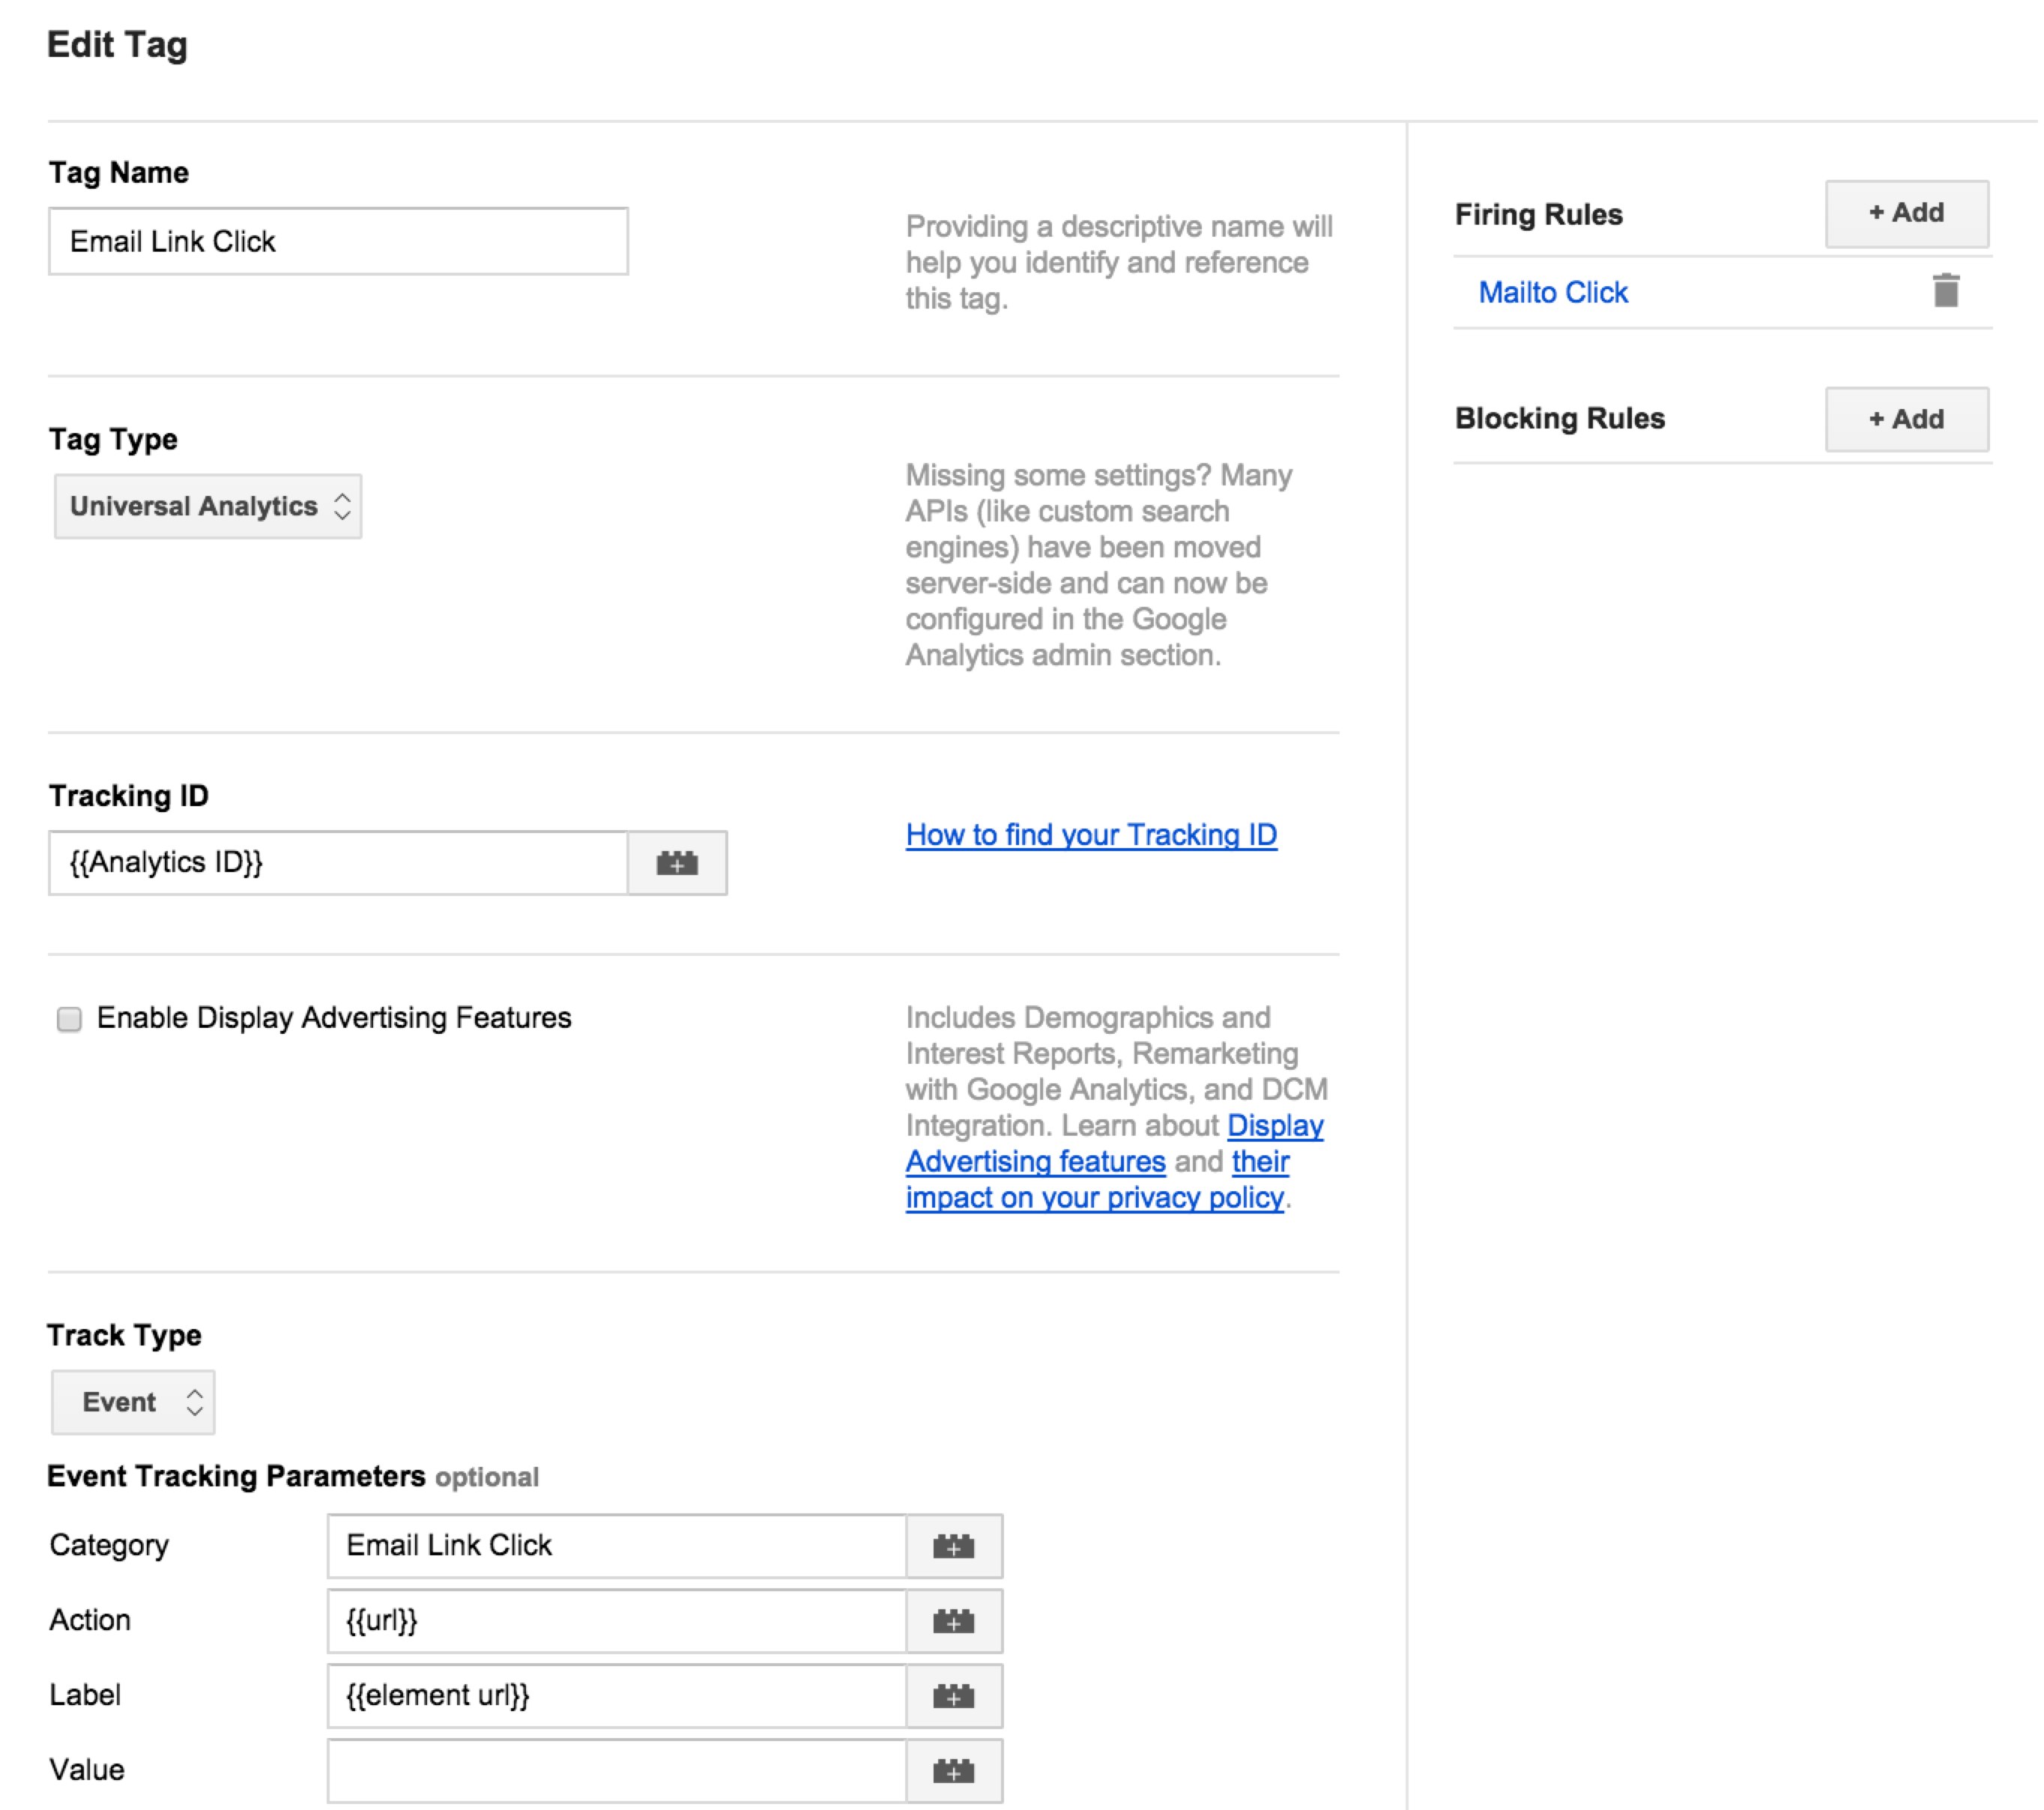
- *Tag Name: * Give the tag a name that makes sense to you. In this example, we're creating tag that tracks any click on an email address.
- *Tag Type: * Select either "Universal Analytics" or "Classic Analytics", depending on whichever you are using.
- Tracking ID You can either manually type your unique Google Analytics ID into this field (ex: UA-########-1) or use a convenient macro that plugs this in for you.
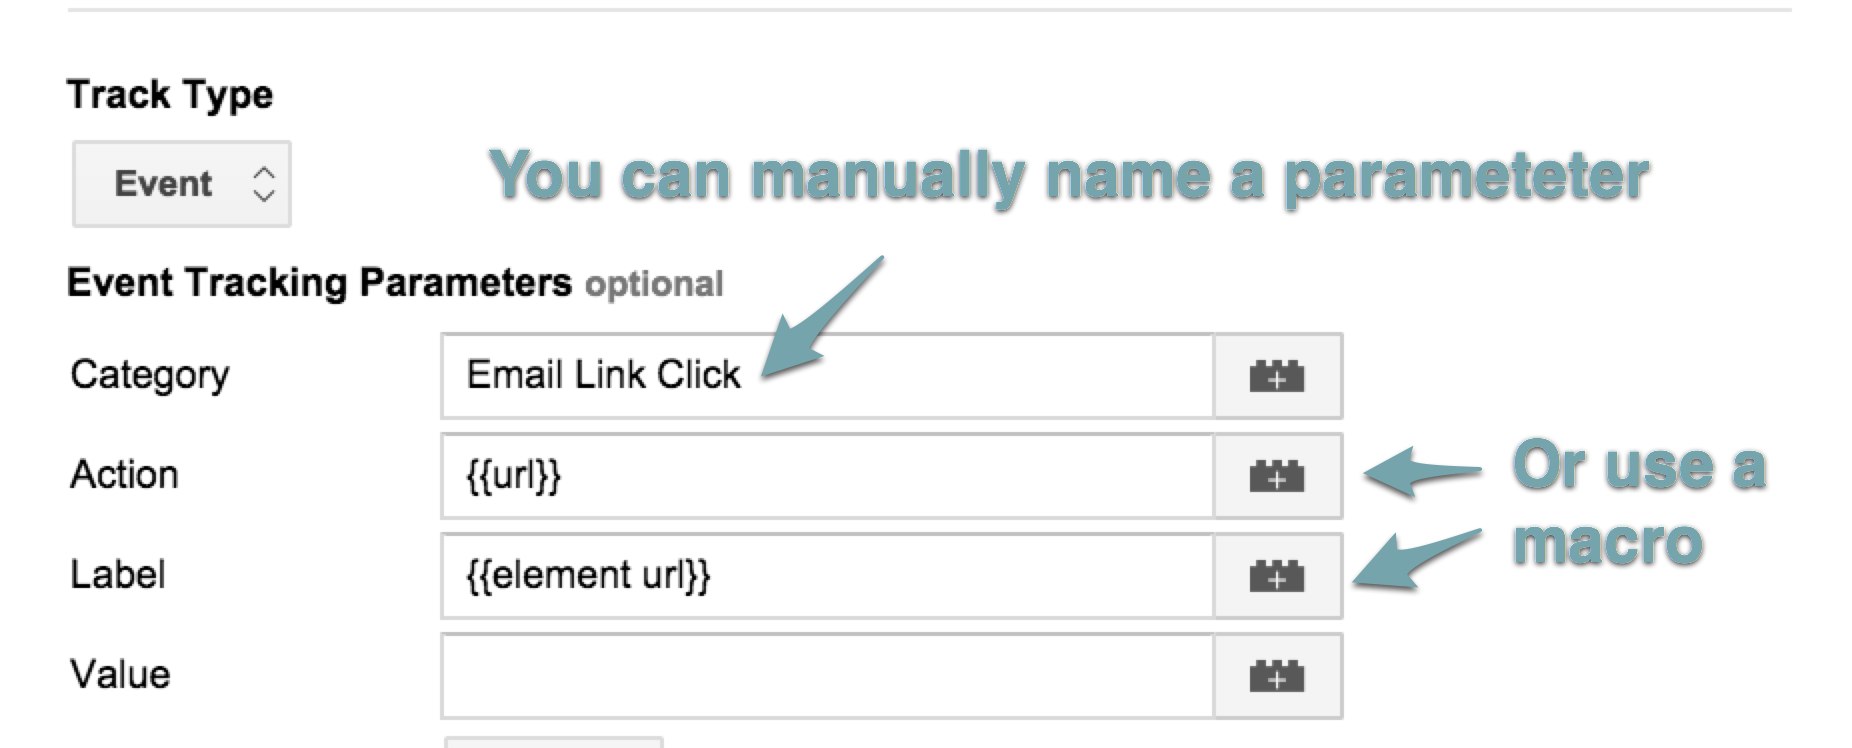
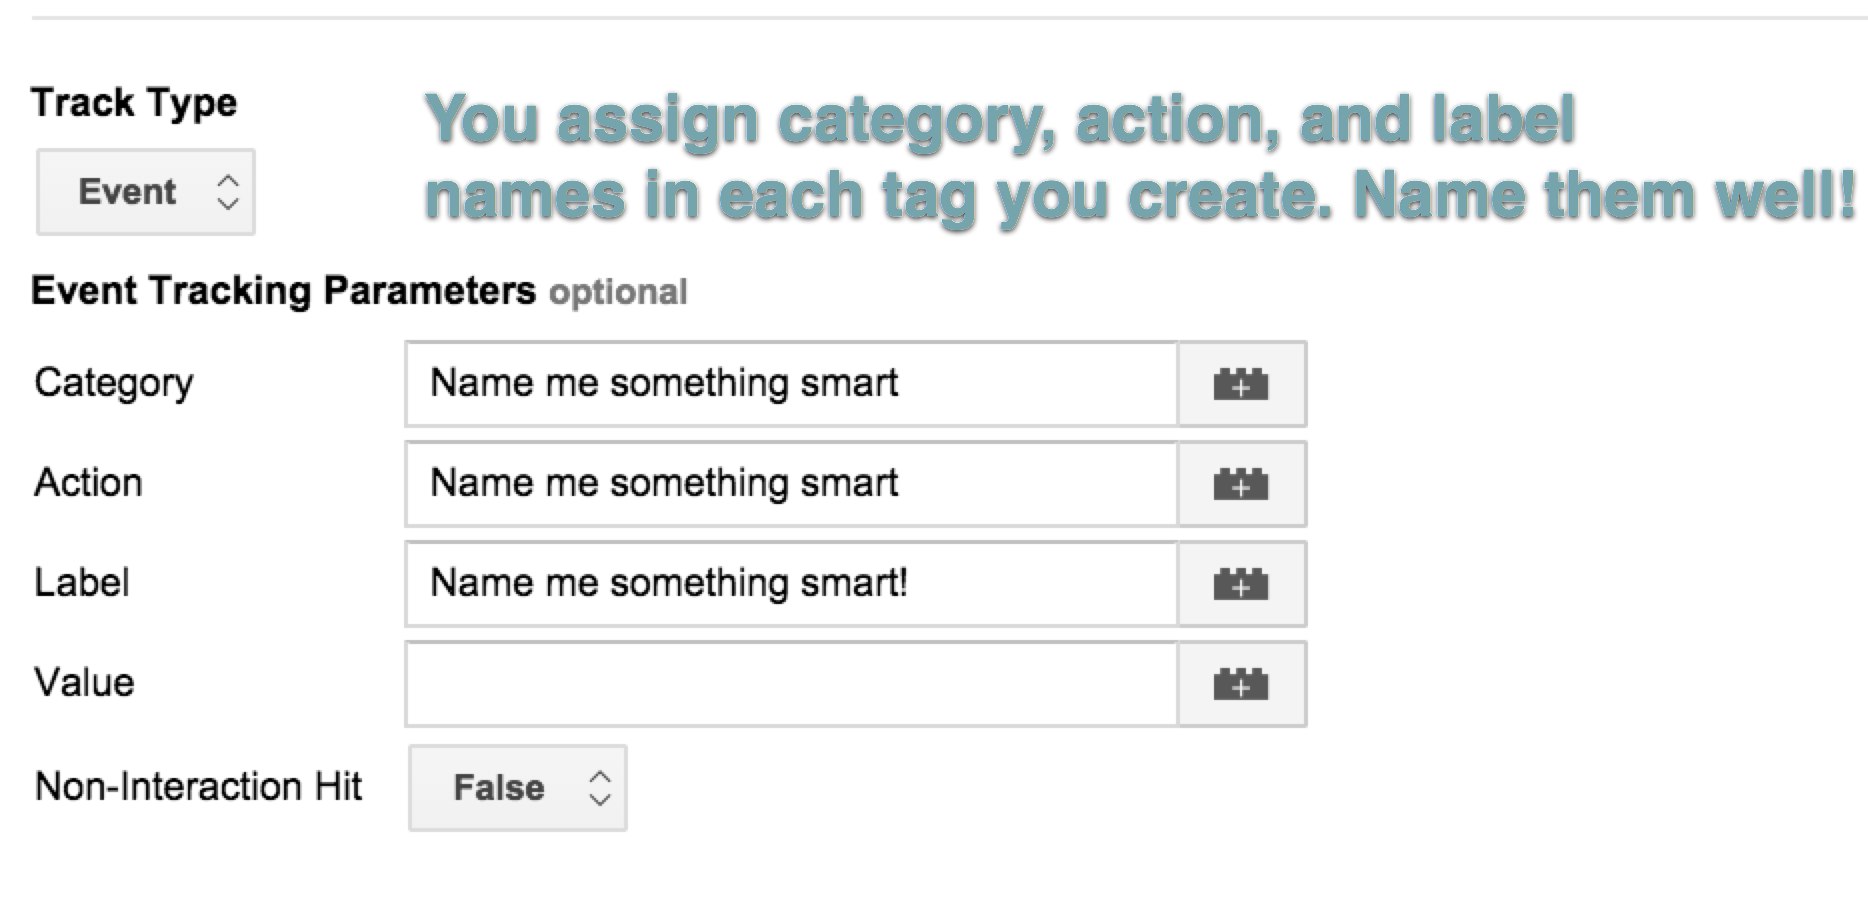
- *Track Type: * Select "Event" as the tag type. Why? Because we're creating an event to track clicks on a specific type of link!
- Assign Parameters: * Here is where you assign the tag's Category, Action, and Label. All three of these descriptive items will show up in your GA reporting interface, telling you stuff about the link users clicked on.
 You can choose to either manually name everything, or use macros to plug in data for you: I generally use a combination of the two. In this case, this is what I used:
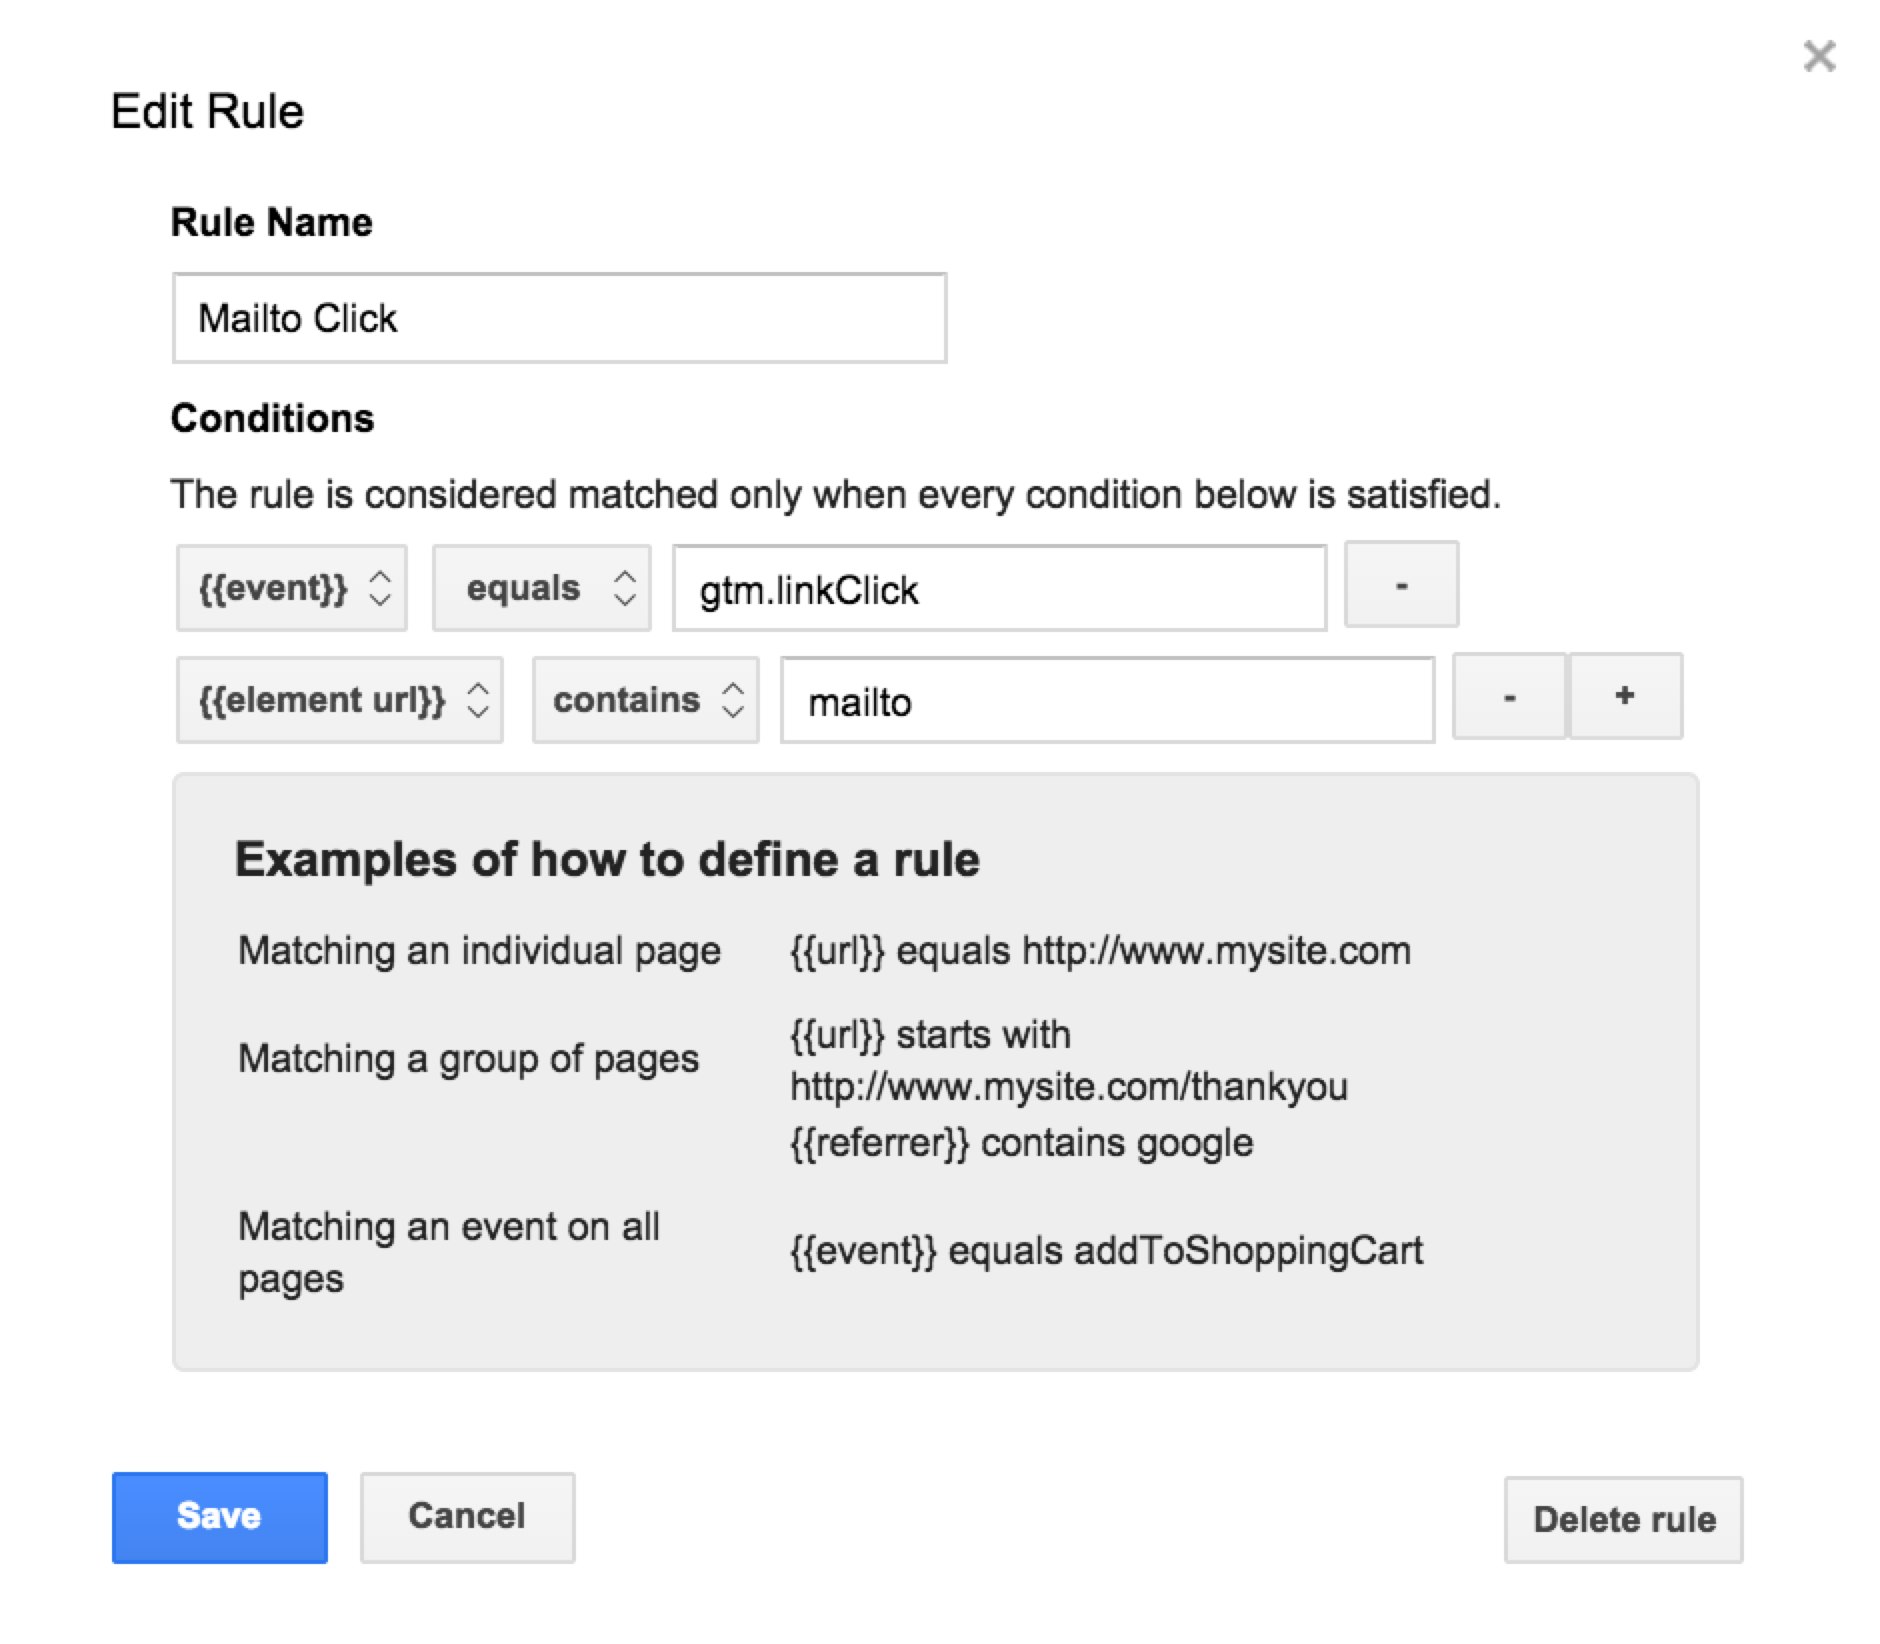
*Category: Email Link Click - I manually named this, so it's easy for me to see that this category includes any link on an email address.
Action: {{url}} *- This is a macro. True to its name, the URL macro plug the URL of the page that the link click occurred on. For example, if someone was on the /about/ page, and clicked on an email address, then Google Analytics will record /about/.
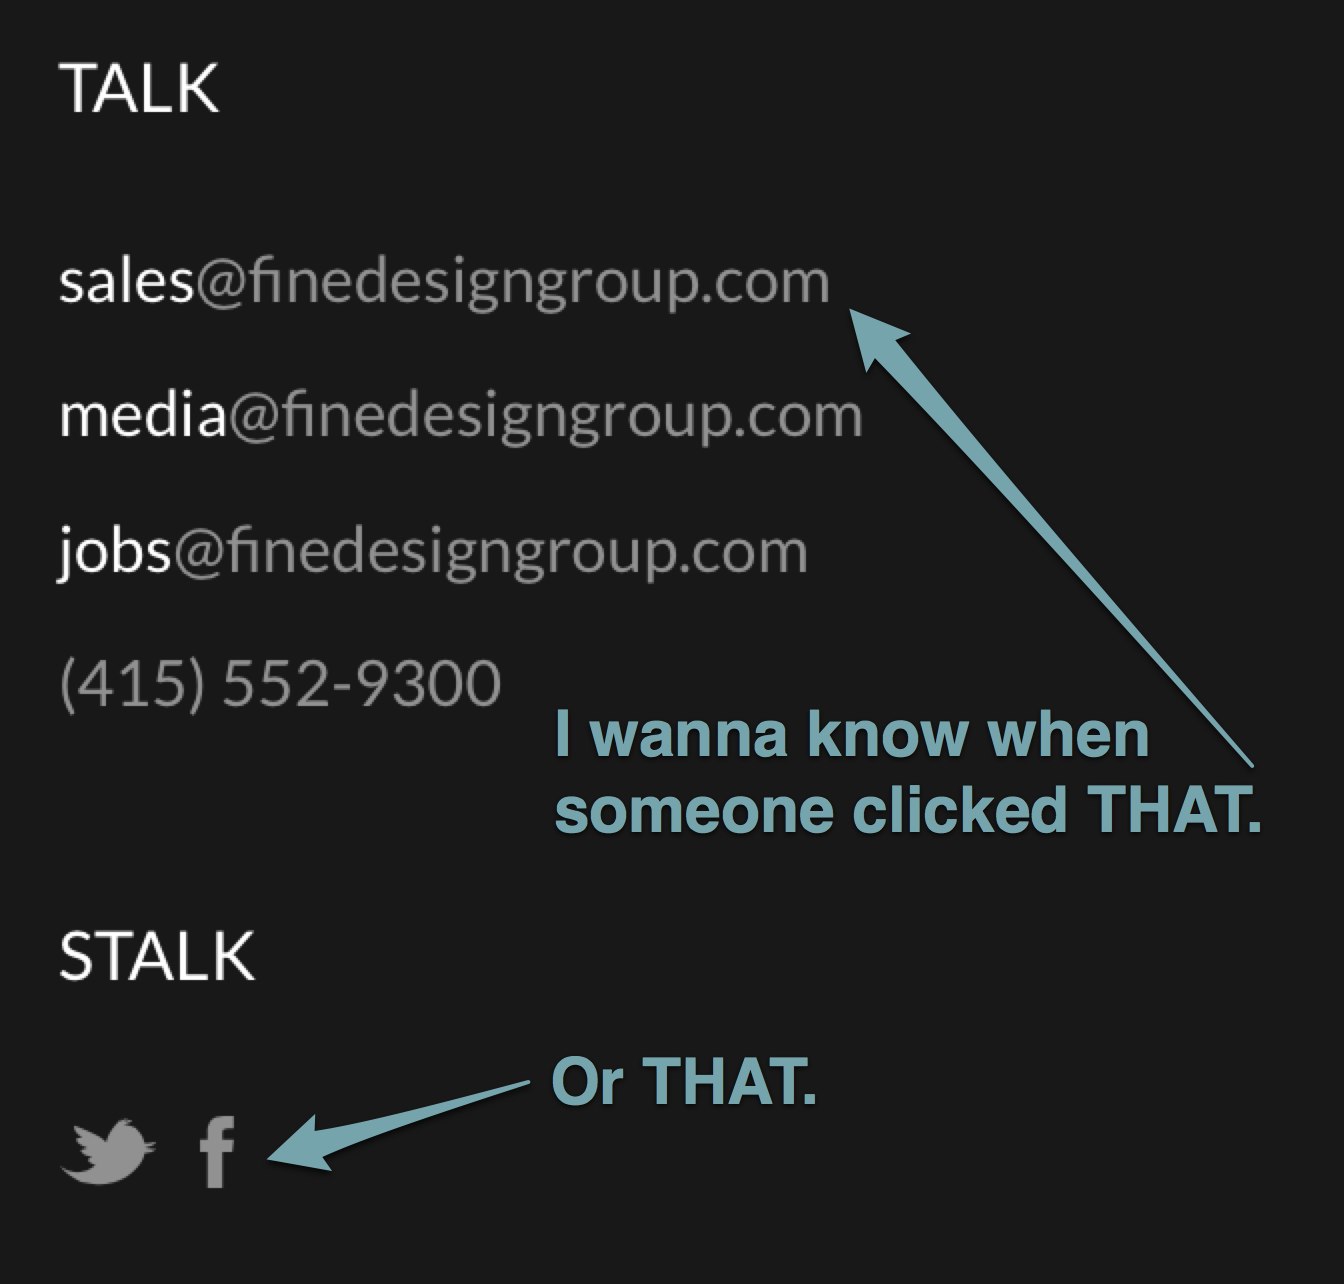
*Label: {{element url}} - Also a macro, this Element URL macro records the specific link that was clicked on. For example, if the user clicks on "sales@wearefine.com", that's what Google Analytics will record. - Add Firing Rules: Because this tag is tracking clicks on email addresses.... we want to create firing rules that isolate links to only emails! Here is what the firing rules look like for this tag:
 Event Equals gtm.linkClick: You will want to use this rule for ANY and ALL link click events. You need to make sure tag manager associates the event with this tag. Be sure that you spell gtm.linkClick exactly as it looks: this field is case sensitive. I once went bonkers when I couldn't get a link click tag to work... and it all came down to a lowercase typo.
Element URL contains mailto: This is where the firing rules are truly specific to tracking clicks on email addresses. Every single email address links contains mailto: so this firing rule ensures that this tag only fires on clicks where links are "mailto" type email addresses.
This makes to total sense when you look at how an email address link is formatted:
<a href="mailto:sales@wearefine.com">sales@wearefine.com</a>
That's it! Just save the tag and then test before publishing.
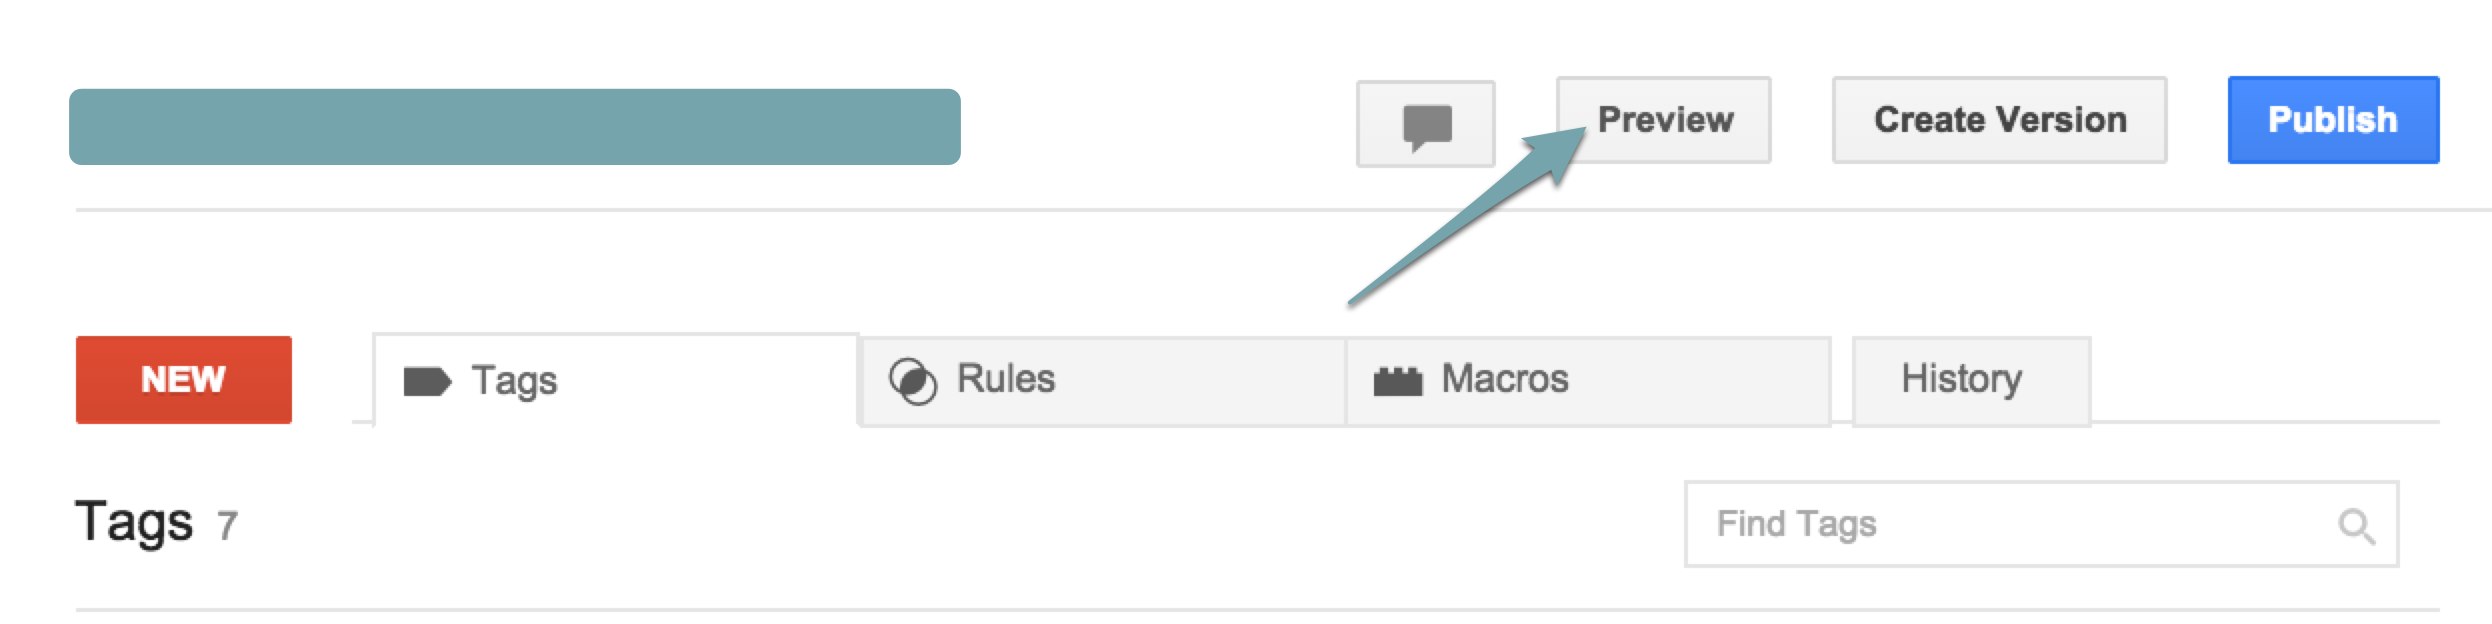
STEP 3: Simple Tag Testing
After you've saved your new tag, go ahead and select Preview, and then Debug:
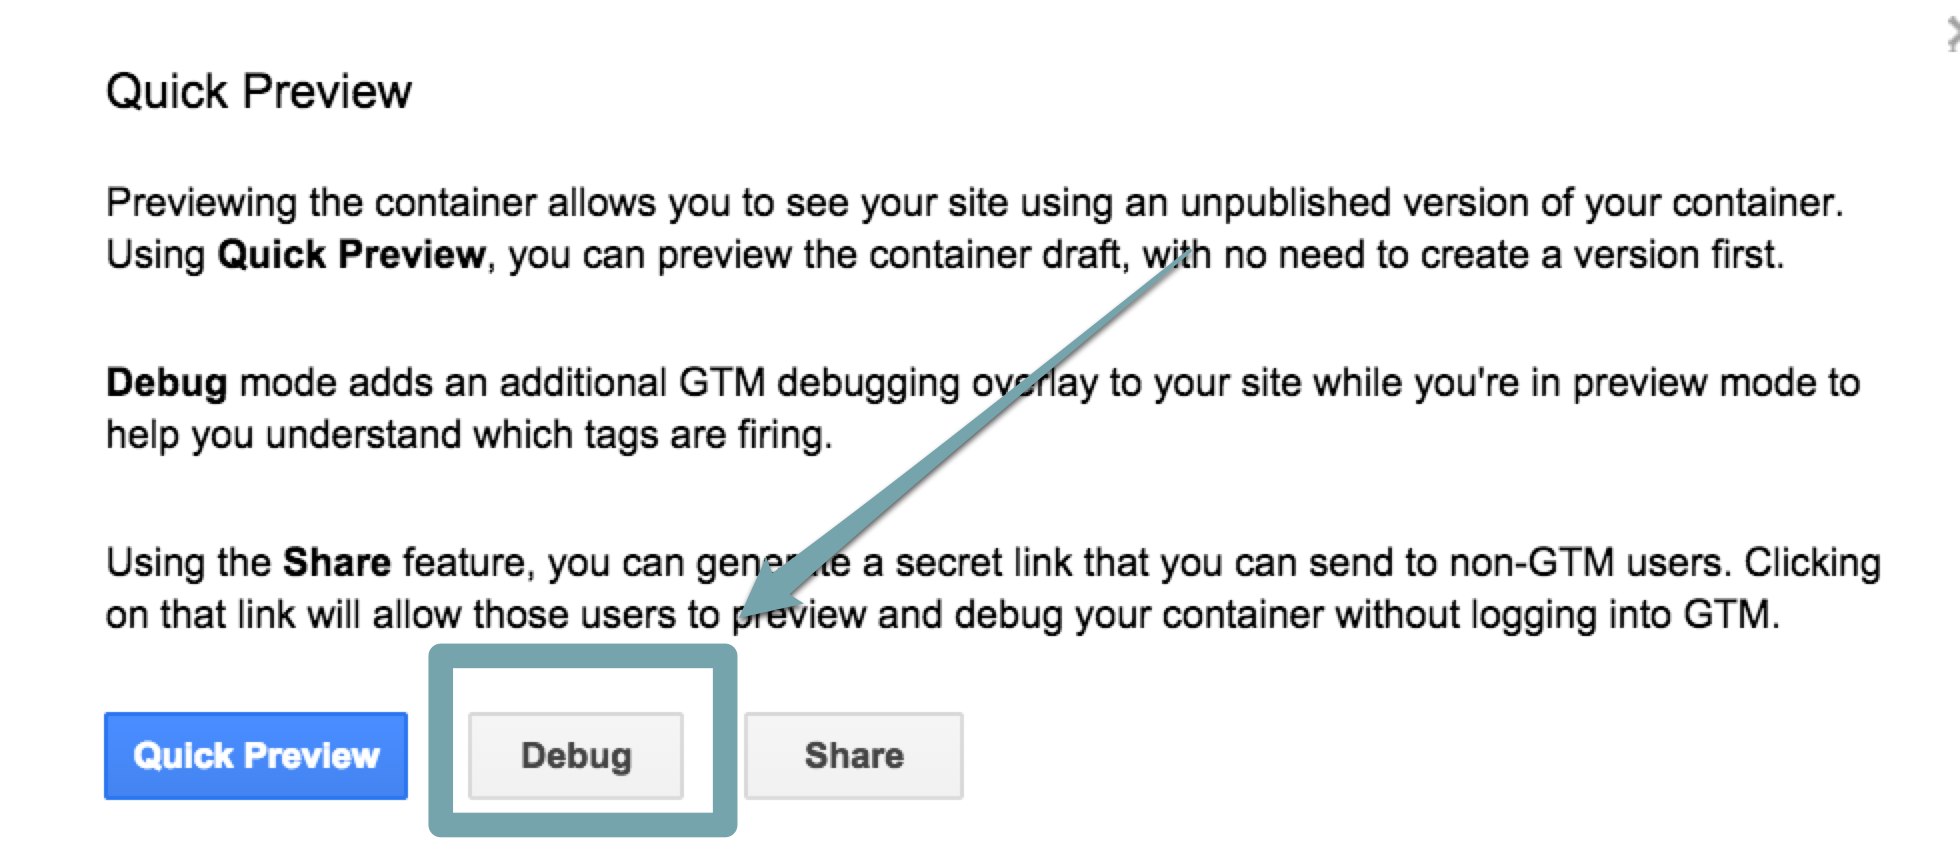
Then, open up your website to a page you'd like to test. You'll see a nice overlay at the bottom that tells you what Google Tag Manager is currently "hearing":
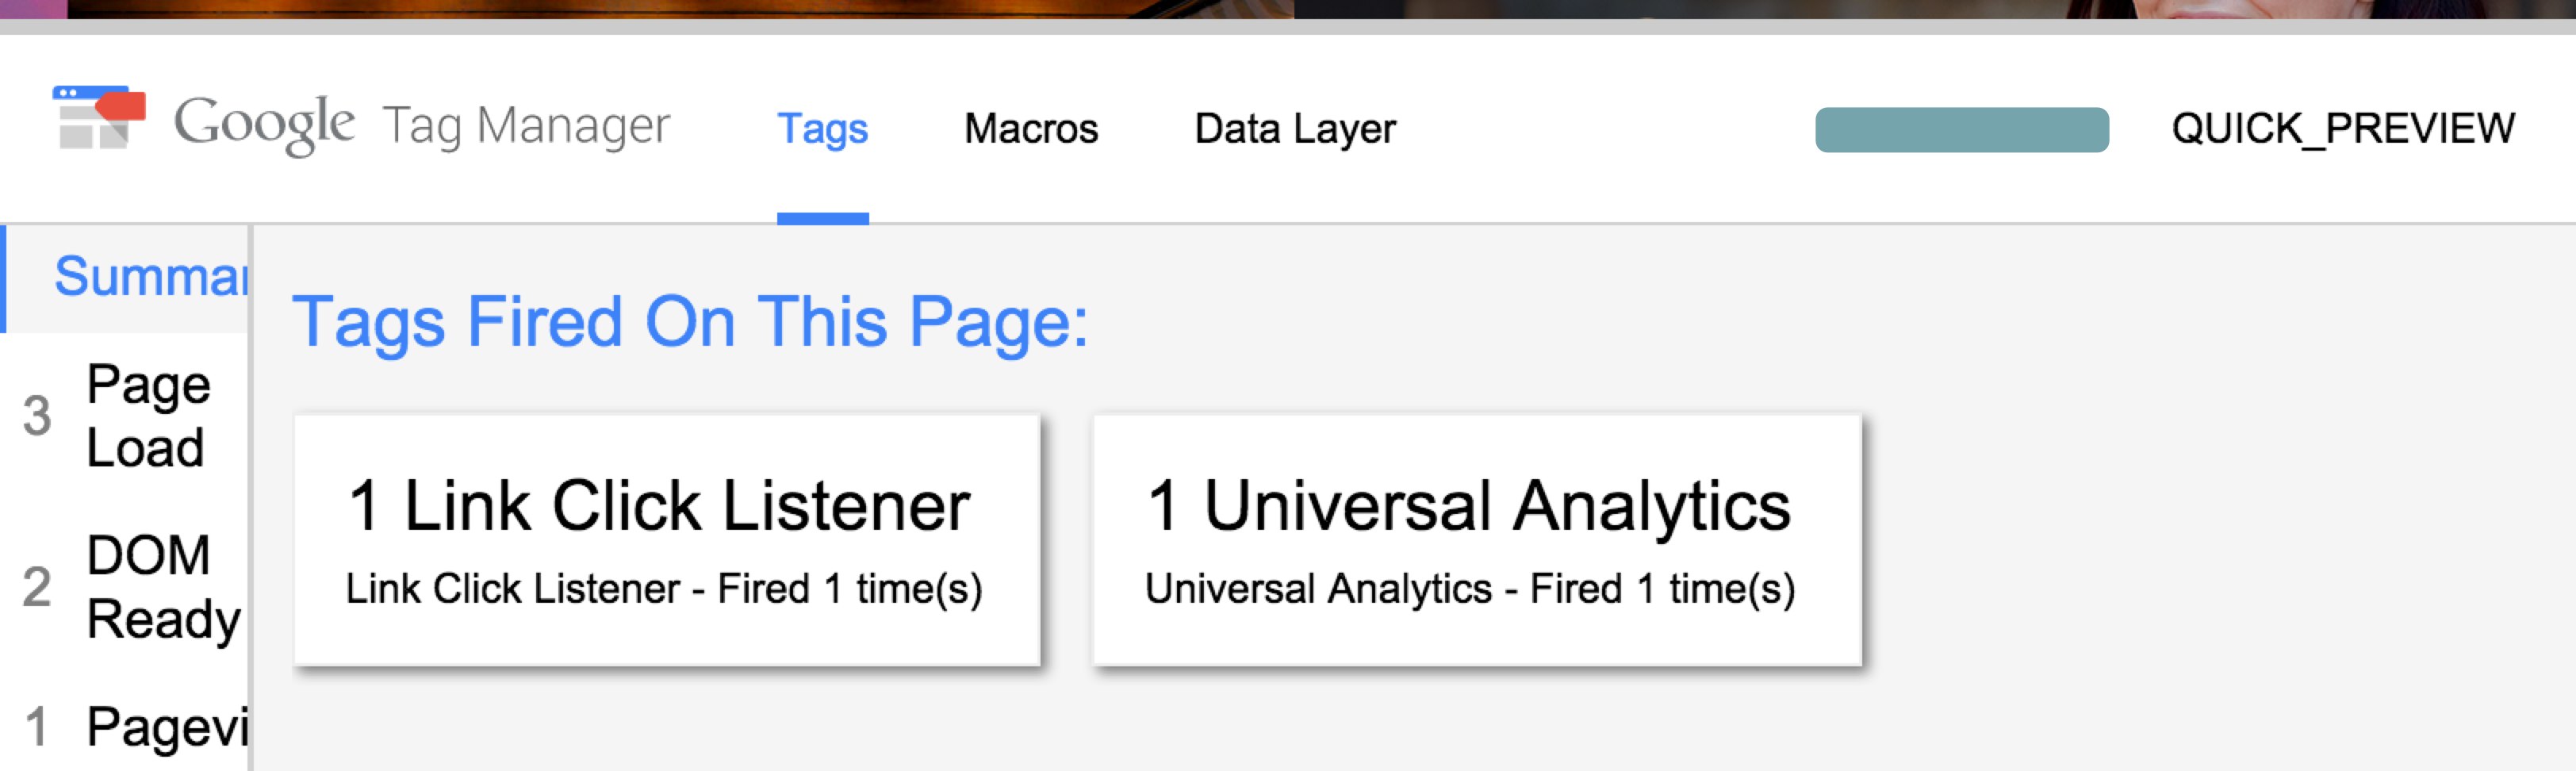
Go ahead and click on an email address (you may want to open the link in a new window). You should see a new tag pop up telling you that it tracked the email link click event:
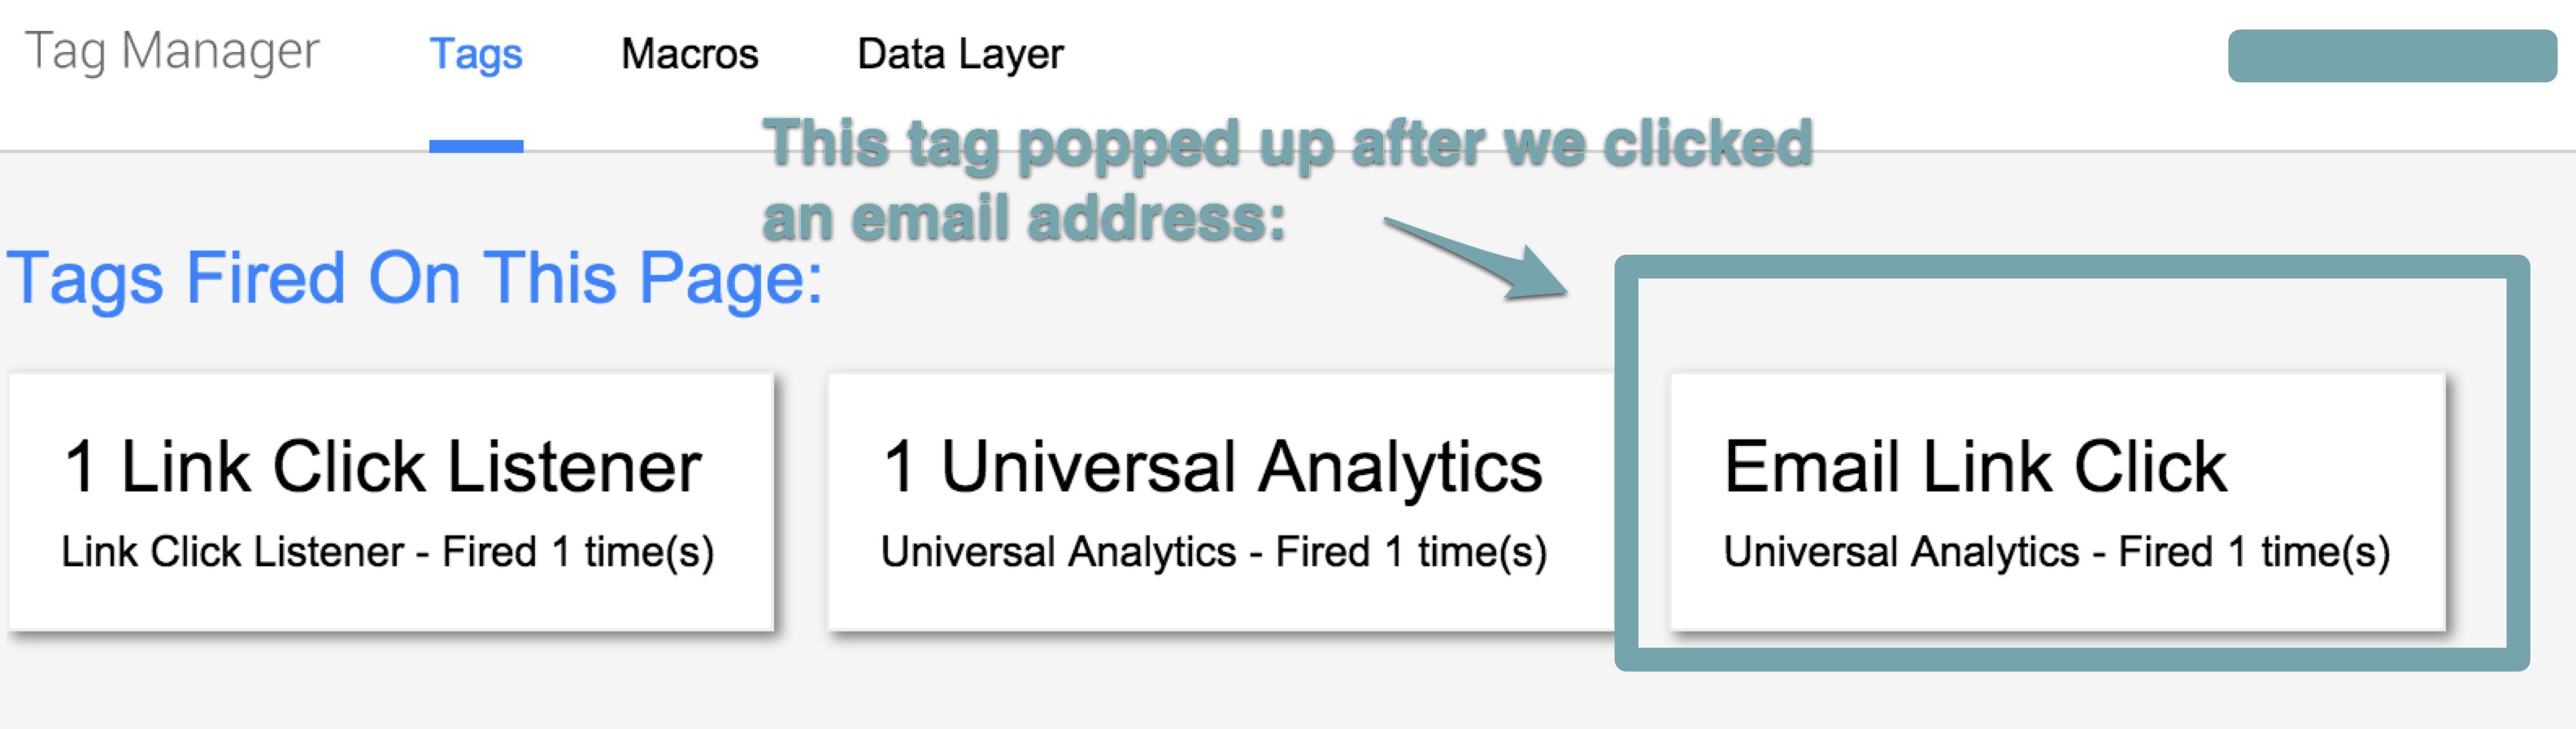
Once you've confirmed the tag works, the next step is to save a new version and publish everything.
ADDENDUM: Plan Out Your Events in a Spreadsheet
Your event reporting interface in Google Analytics will either look really pretty, or really messy, depending on how you organize your event Categories, Actions, and Labels:
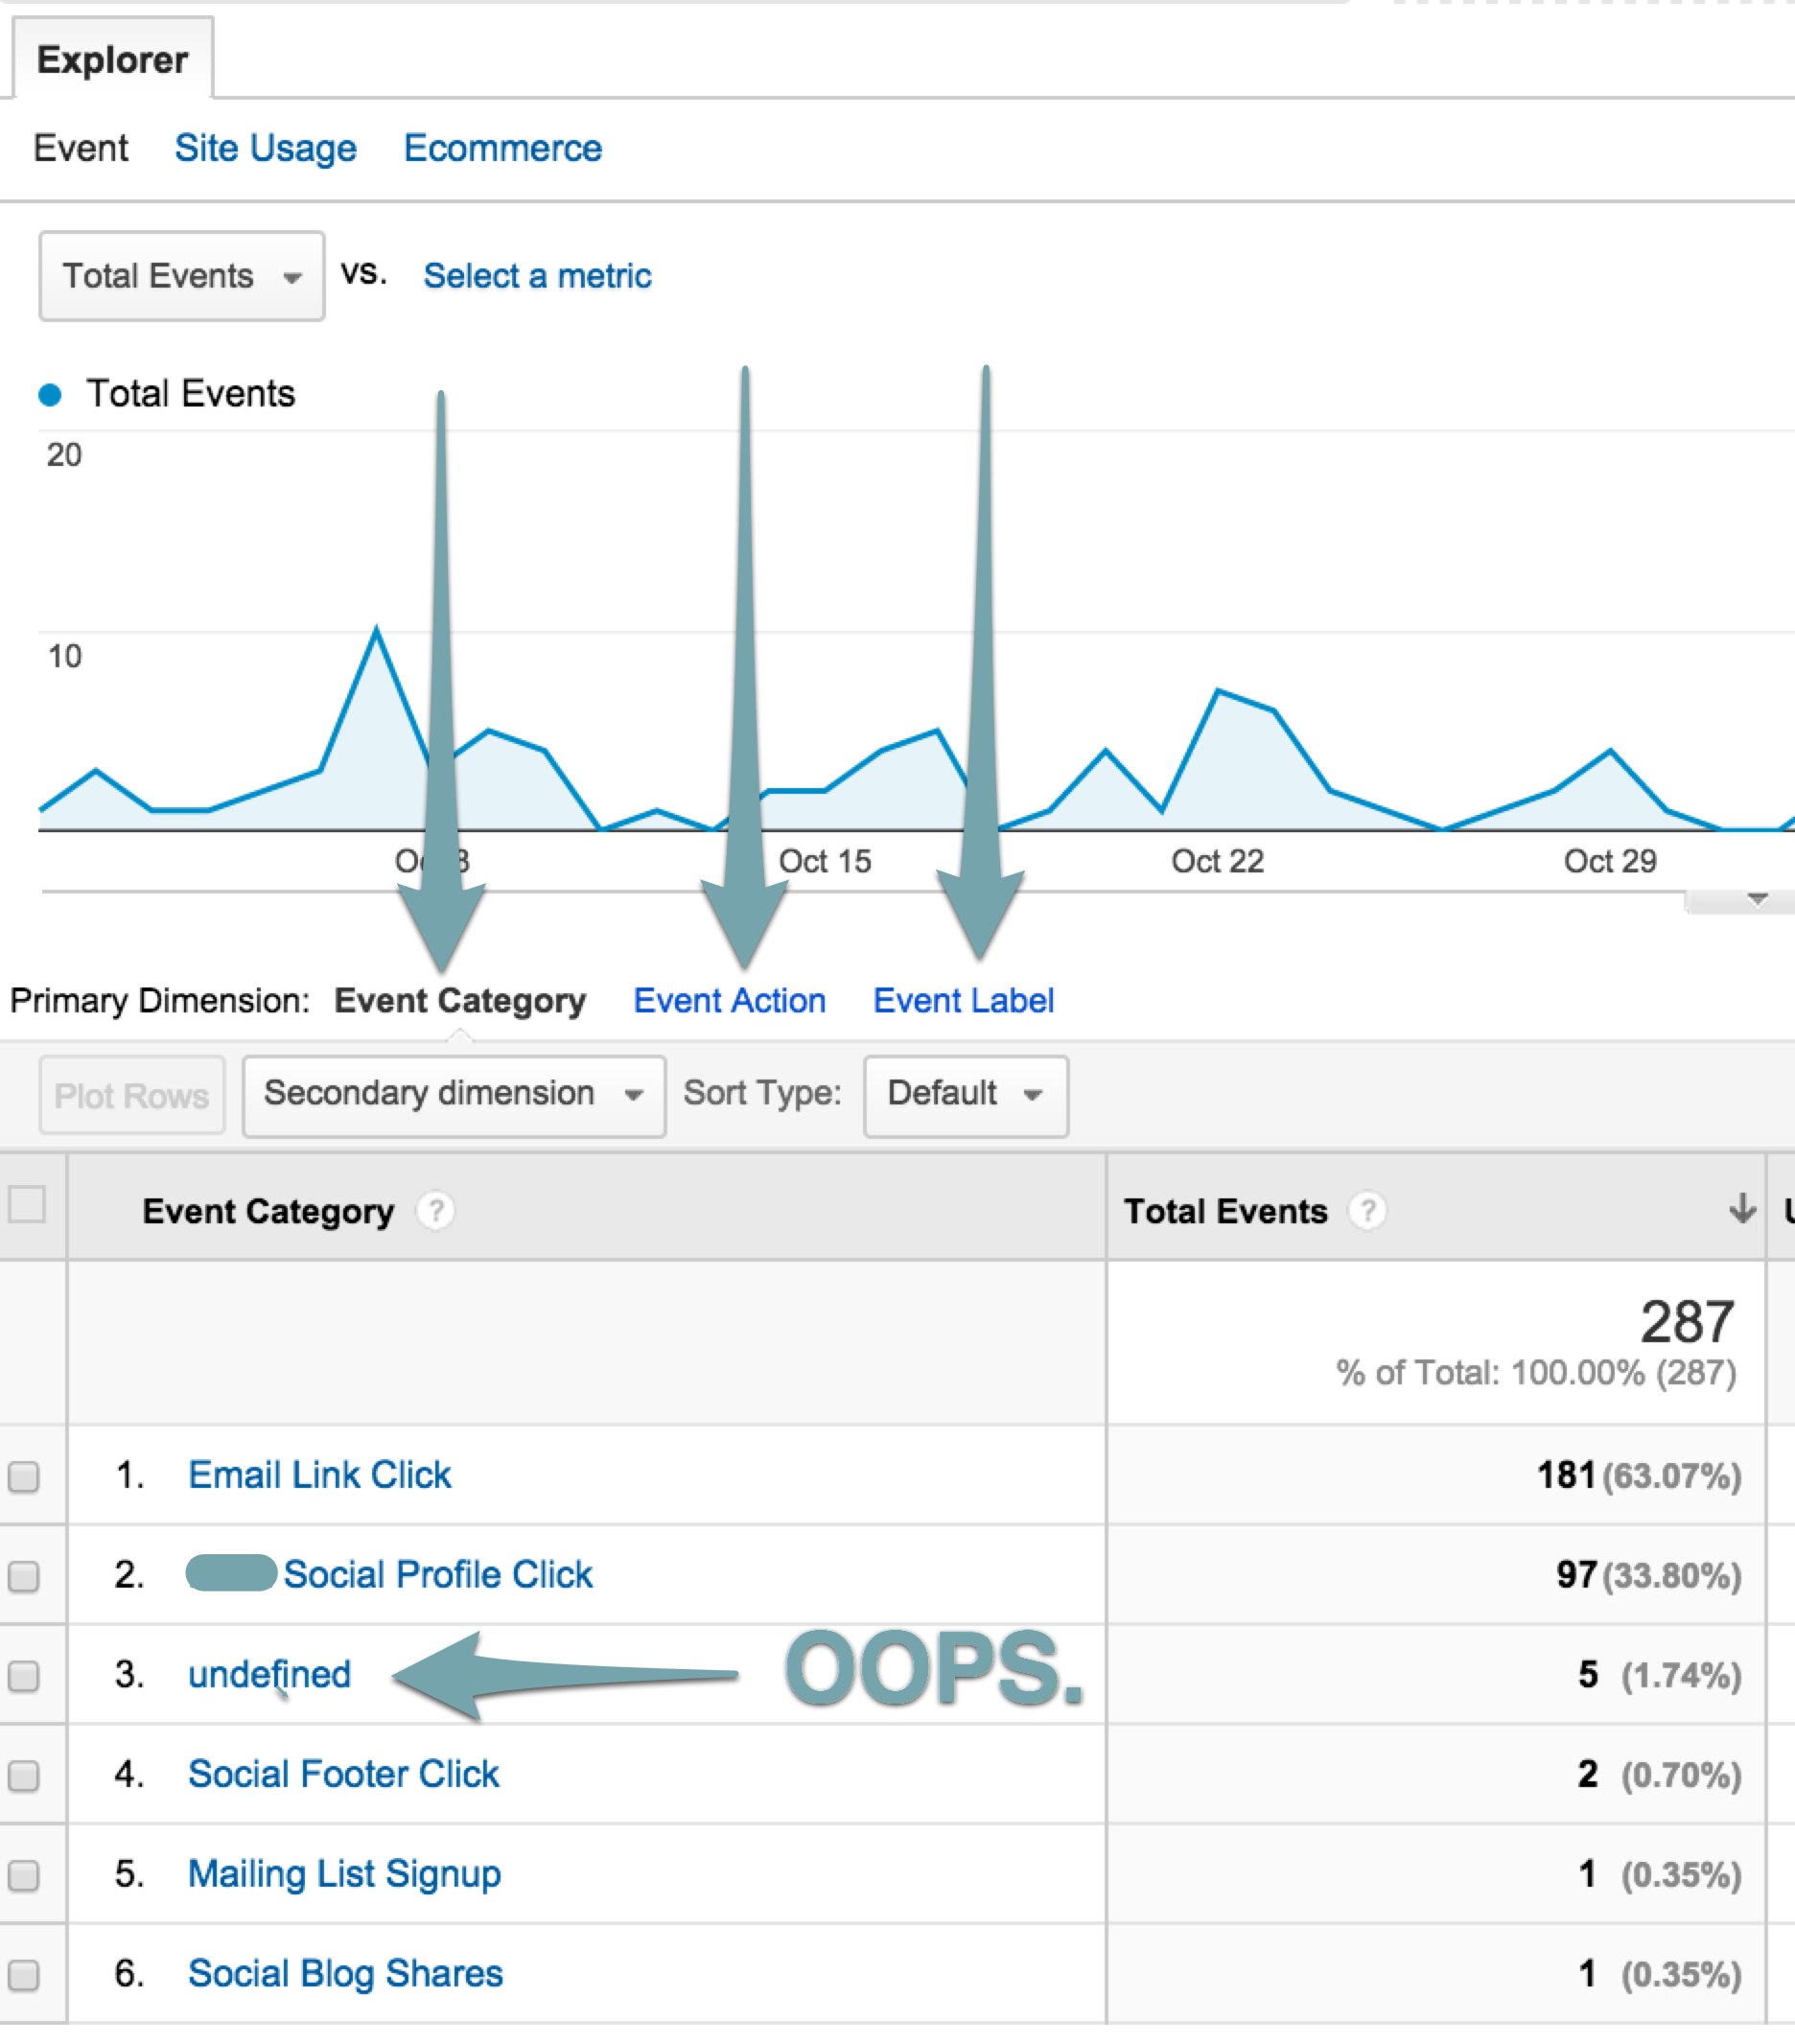
Take a look how the profile above has named categories.... do you think they are easy to understand? See how that one event isn't named correctly, so it shows as undefined?
All of these things should be clearly stipulated for tags you will be setting up:
There are a variety of approaches you can take to naming tags, categories, labels, firing rules, and more. There isn't just "one" way to do this: what matters is that it's easy for you and others to understand.
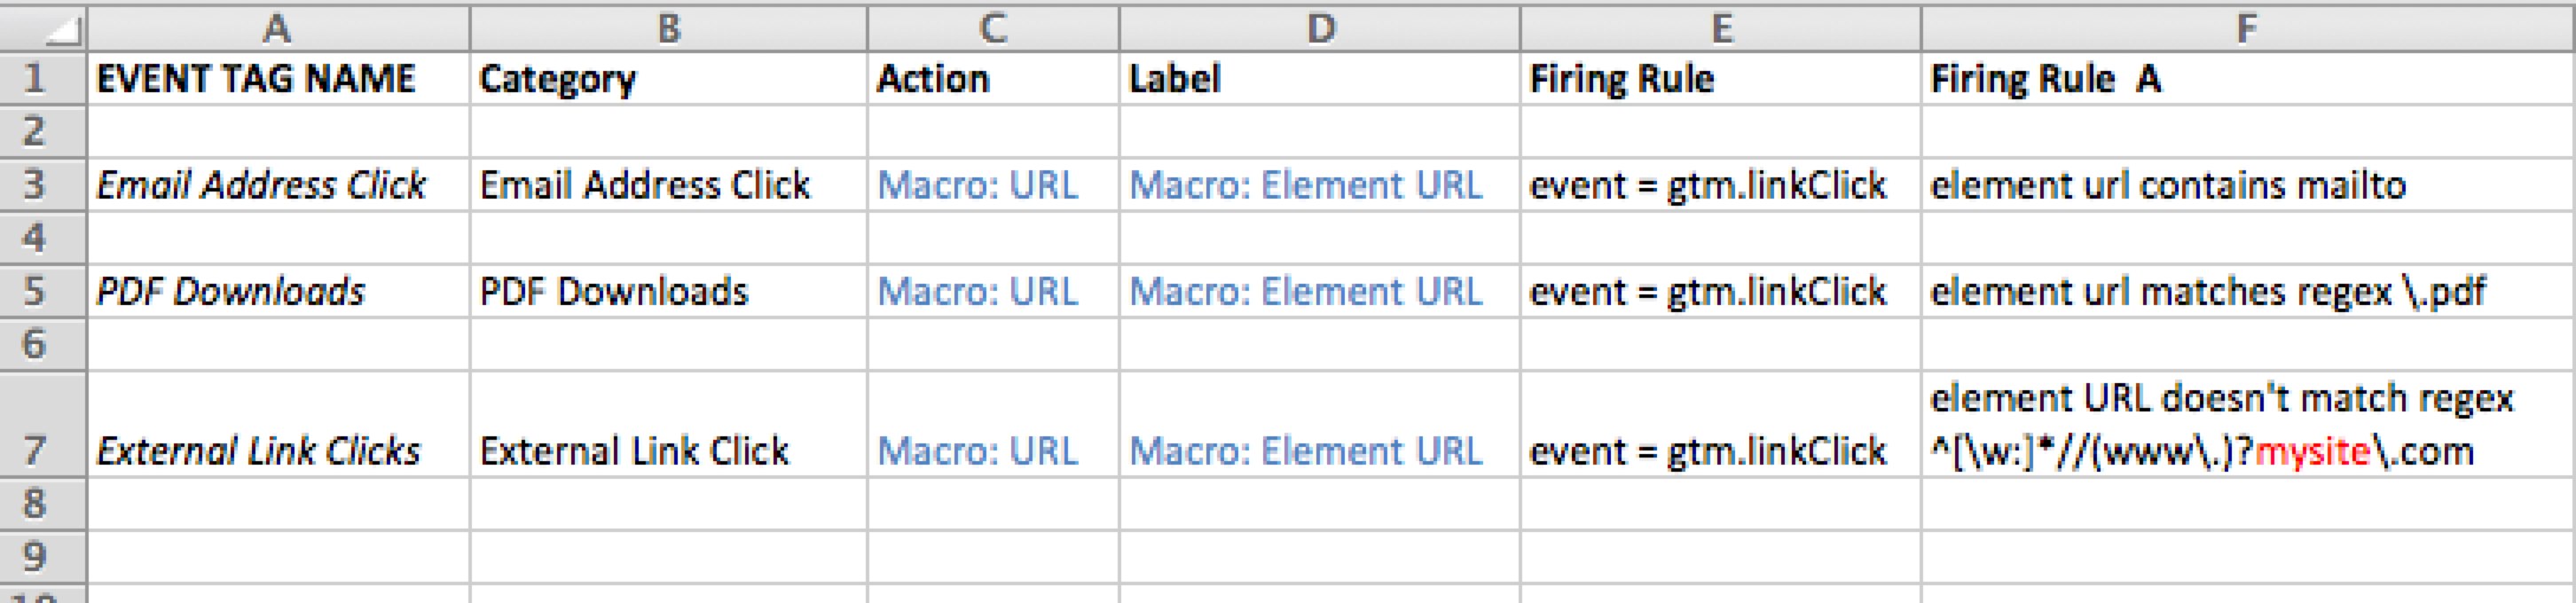
Before I start with any event tracking implementation, I create a spreadsheet that maps out:
- Event Tag Name
- Category
- Action
- Label
- Firing Rule(s)
Here's a simplified version of what this looks like in a spreadsheet:
